
How to Use Diodes in LED Tape Light Repairs
Few things are more frustrating than watching your carefully installed LED tape lights suddenly fail, leaving dark sections or erratic flickering where there should be smooth, vibrant illumination. While many assume these failures mean replacing entire strips at significant expense, the real culprit often lies in a tiny, inexpensive component: the diode. These semiconductor devices play a crucial protective role in LED circuits, yet they remain largely misunderstood by DIY enthusiasts and electronics hobbyists. This article aims to demystify diodes and empower you with the knowledge to diagnose and repair LED tape light failures affordably and effectively. Rather than discarding malfunctioning strips, you’ll learn how to identify diode-related problems, source quality replacement components without breaking the bank, and execute repairs with confidence. Whether you’re maintaining your home lighting or exploring electronics as a hobby, understanding diode-based repairs opens the door to cost-effective solutions and the satisfaction of fixing things yourself. With practical guidance and straightforward techniques, you’ll discover that most LED tape light issues are surprisingly manageable when you know where to look and what to do.
Understanding Diodes and Their Role in LED Tape Lights
A diode is a semiconductor device that acts as a one-way valve for electrical current, allowing it to flow in a single direction while blocking reverse flow. This fundamental property makes diodes indispensable in LED tape light circuits, where they serve multiple protective and operational functions. In typical diode LED tape light installations, you’ll encounter rectifier diodes that convert alternating current to direct current when needed, and Zener diodes that regulate voltage levels to prevent damage from electrical surges.
The protective role of diodes cannot be overstated. LED chips are extremely sensitive to voltage spikes and reverse polarity connections, either of which can instantly destroy them. Diodes positioned strategically in the circuit absorb or redirect these potentially harmful electrical events before they reach the delicate LED components. When your power supply experiences a sudden surge—perhaps from a lightning strike or grid fluctuation—the diode takes the hit instead of your expensive LED array. Additionally, diodes ensure that current flows through LEDs in the correct direction, maintaining consistent brightness and color accuracy across the entire tape length. Without properly functioning diodes, your LED tape lights become vulnerable to premature failure, inconsistent performance, and complete circuit breakdown. Understanding this protective relationship helps you appreciate why a small, inexpensive diode often determines whether your entire lighting installation works flawlessly or fails catastrophically.
Identifying Common LED Tape Light Problems and Diode Solutions
LED tape light failures typically manifest in several recognizable patterns. The most common issue is complete darkness in specific sections while adjacent areas continue functioning normally, often indicating a failed diode or LED chip in that segment. Flickering or intermittent operation suggests loose connections or partially degraded diodes struggling to maintain proper current flow. Color inconsistencies—where white light appears tinged with blue or sections display different color temperatures—frequently point to voltage regulation problems caused by malfunctioning Zener diodes. Dimming over time across the entire strip may indicate gradual diode degradation affecting current distribution.
Diode failures occur in two primary modes: open circuits and short circuits. An open-circuit diode behaves like a broken wire, completely blocking current flow and causing downstream LEDs to go dark. A short-circuit diode allows current to flow in both directions uncontrolled, potentially overloading LED chips and causing erratic behavior or rapid burnout. These repair components are your first diagnostic target when troubleshooting. Before assuming you need expensive replacements, check your diodes systematically.
Diagnostic Steps for Diode-Related Failures
Begin by disconnecting power completely and waiting several minutes for capacitors to discharge. Set your multimeter to the diode test mode, typically indicated by a diode symbol. Touch the red probe to the diode’s anode and black probe to the cathode—a functioning diode should show a voltage drop reading between 0.5-0.8V for standard rectifiers. Reverse the probes; a good diode displays “OL” or infinite resistance. If both directions show continuity, the diode is shorted; if both show infinite resistance, it’s open. Visually inspect for burn marks, cracks, or discoloration on the diode body, which indicate thermal failure. Always test with the diode removed from the circuit when possible for accurate readings, as parallel components can create false continuity paths.
How to Buy Diodes for Affordable Repairs
Sourcing replacement diodes doesn’t require breaking your budget or navigating complex industrial suppliers. Online electronics retailers offer individual diodes for pennies each, with bulk packs of 50-100 pieces costing just a few dollars—ideal for hobbyists building a component library. Major e-commerce platforms feature sellers specializing in electronic components where you can buy diodes alongside other repair essentials, often with free shipping on small orders. Specialized suppliers like Utsource provide access to a wide range of automation accessories and electronic components with detailed specifications, making it easier to find exact replacements for your LED tape light repairs. Local electronics shops, while less common than they once were, still exist in many cities and provide the advantage of immediate availability and knowledgeable staff who can verify specifications on the spot.
When comparing purchasing options, pay close attention to the diode’s voltage and current ratings printed on its body or listed in specifications. For typical 12V LED tape lights, 1N4001 through 1N4007 rectifier diodes work excellently, with the higher numbers indicating greater voltage tolerance. Zener diodes require matching the exact voltage rating to your circuit’s needs—a 12V Zener for 12V systems, for instance. Bulk buying makes economic sense if you maintain multiple installations or enjoy electronics projects regularly; a hundred diodes cost roughly the same as ten purchased individually. However, ensure you’re purchasing from established sellers with positive reviews, as counterfeit components occasionally appear at suspiciously low prices.
Evaluating Sources for Quality Electronic Parts
Reputable suppliers typically provide detailed datasheets, clear component markings, and reasonable return policies. Check seller ratings and review comments specifically mentioning component authenticity and performance. Established electronics distributors maintain quality control standards that marketplace sellers may not, though they sometimes charge slightly more. When sourcing from bulk suppliers catering to manufacturing needs, verify they sell to individual customers and don’t require minimum order quantities beyond your budget. Quality electronic parts exhibit consistent physical appearance with crisp, legible markings—blurred printing or irregular sizing often signals inferior or counterfeit components. Investing an extra dollar in verified quality parts prevents the frustration of failed repairs and protects your LED tape lights from damage caused by substandard components that fail under normal operating conditions.
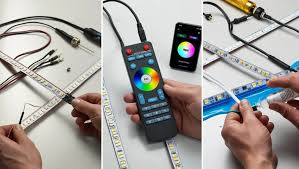
Step-by-Step Guide to Repairing LED Tape Lights with Diodes
Preparation and Safety First
Before beginning any repair, gather your essential tools: a temperature-controlled soldering iron (25-40 watts ideal), rosin-core solder, desoldering wick or solder sucker, wire cutters, needle-nose pliers, and your multimeter. You’ll also need isopropyl alcohol and a small brush for cleaning flux residue. Disconnect the LED tape light from all power sources and wait at least five minutes for capacitors to fully discharge—this prevents dangerous shocks and protects you from unexpected current flow. Work in a well-ventilated area, as soldering produces fumes that shouldn’t be inhaled continuously. Keep a damp sponge nearby for cleaning your soldering iron tip, and wear safety glasses to protect against solder splatter. Lay the LED strip on a heat-resistant surface with adequate lighting, and identify the exact location of the failed diode using your earlier diagnostic findings. Having replacement diodes pre-tested and within arm’s reach streamlines the process considerably.
Execution: Soldering and Installing Diodes
Heat your soldering iron to approximately 350°C (660°F)—hot enough to melt solder quickly but not so hot that it damages the PCB or adjacent components. Position the LED strip securely, and apply the iron tip to one diode lead while simultaneously touching desoldering wick to absorb the melted solder. Work on one lead at a time, gently pulling the diode free once both connections are clear. Clean the pads with isopropyl alcohol to remove flux residue. Before installing the replacement, verify polarity—diodes have a cathode marking (typically a band or line) that must align with the circuit board’s markings. Insert the new diode, ensuring leads sit flush against pads without excessive bending. Apply the soldering iron to the pad and lead together for 2-3 seconds, then introduce solder to create a smooth, cone-shaped joint. Avoid prolonged heat application, which can damage the diode internally or lift PCB traces. Trim excess lead length with wire cutters, leaving about 1mm above the solder joint. Inspect each connection under good lighting—proper joints appear shiny and evenly flowed, not dull or blobby. Once both leads are secured, clean the area again with isopropyl alcohol. Before reconnecting power, use your multimeter to verify the new diode functions correctly and that no solder bridges connect adjacent traces. Reconnect power gradually, testing the repaired section first before restoring full operation. If the section illuminates properly with consistent brightness and color, your repair is successful.
Ensuring Long-Term Reliability with Quality Components
The difference between a repair that lasts years and one that fails within weeks often comes down to component quality and installation care. When selecting diodes for your LED tape light repairs, prioritize components from established manufacturers with clear specifications and proper markings. Quality electronic parts may cost marginally more than bargain alternatives, but they deliver consistent performance under thermal stress and voltage fluctuations that would destroy inferior counterparts. Always verify that replacement diodes meet or exceed the original specifications—using a 1A diode where a 3A version was installed invites premature failure under normal operating loads.
Proper installation techniques extend component lifespan significantly. Avoid overheating diodes during soldering by limiting iron contact to three seconds per joint, and allow components to cool naturally between connections. Ensure adequate spacing around diodes for heat dissipation, and never force components into positions that stress their leads. After completing repairs, apply a thin coat of conformal coating or clear nail polish over exposed solder joints to protect against moisture and oxidation. Regular maintenance checks every six months—inspecting connections for discoloration or looseness—catch developing problems before they cause failures. When you combine quality repair components with meticulous installation practices, your LED tape lights will deliver reliable illumination for years, validating the time and effort invested in proper repairs rather than wasteful replacements.
Mastering DIY LED Tape Light Repairs
Diodes may be small and inexpensive, but their role in protecting and enabling LED tape light functionality is absolutely critical. Throughout this guide, you’ve learned how these semiconductor components act as guardians against voltage spikes and reverse polarity, how to diagnose diode-related failures using systematic testing methods, and where to source affordable replacement parts without compromising quality. The step-by-step repair process demystifies what initially seems complex, transforming intimidating electrical work into manageable tasks with the right tools and careful attention. By choosing quality electronic parts from reputable suppliers and following proper soldering techniques, you ensure repairs that deliver years of reliable service rather than temporary fixes. The knowledge you’ve gained empowers you to rescue LED installations that others would discard, saving money while reducing electronic waste. More importantly, successfully diagnosing and repairing your own LED tape lights brings genuine satisfaction—the kind that comes from understanding how things work and having the skills to fix them yourself. Whether you’re maintaining your home lighting or expanding your electronics hobby, these diode repair techniques form a foundation for tackling increasingly complex projects with confidence and competence.